Adding documentation to the repository
Option one:
- Open GitHub Desktop.
- Click Repository in the navigation bar.
- Select Show in Finder (MacOS) / Open in Explorer (Windows).
- Add the markdown files to this folder.
- Open GitHub Desktop.
- Open Changes tab and verify if the file is uploaded.
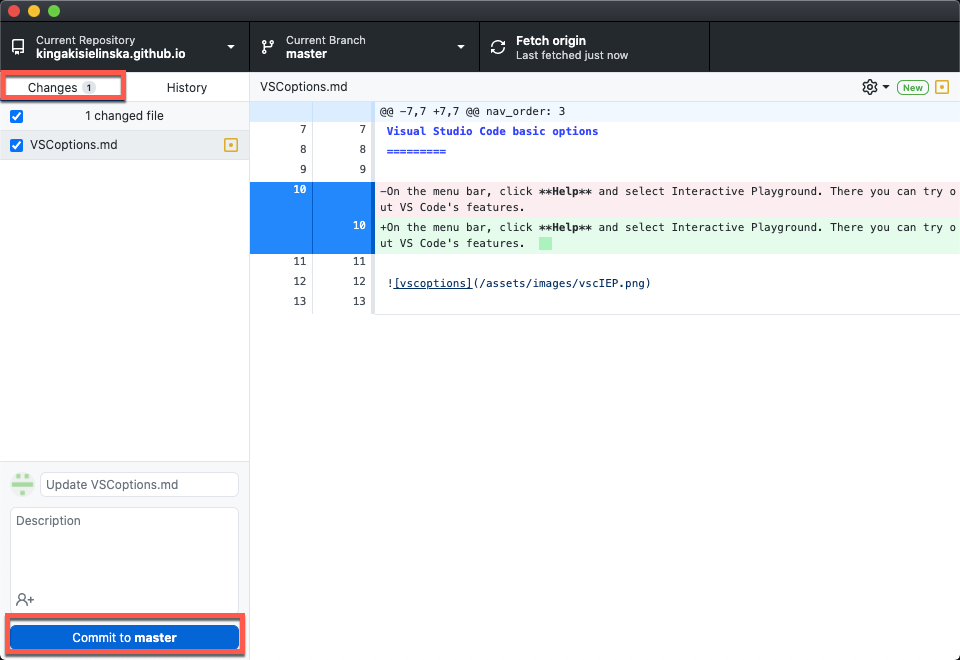
- Write a summary in the Summary field about the change you made to the file.
- Click Commit to master.
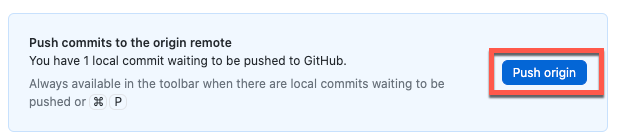
- Click Push origin.
- Go to this website and log in.
- Open your repository and verify if the documents uploaded.
Option two:
- Go to this website and log in.
- Navigate to the main page of the repository.
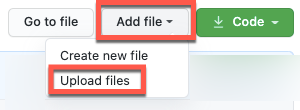
- Above the list of files, using the Add file drop-down, click Upload files.
- Drag and drop the file or folder you want to upload to your repository.
- At the bottom of the page, type a short message that describes the change you made to the file.
- Below the commit message fields, decide whether to add your commit to the current (main) branch or to a new branch.
- Click Commit changes.